There’s something undeniably charming about a homemade cookie, especially one that features a perfect little well of creamy goodness in the middle. Peanut butter thumbprint cookies are a timeless classic, a beloved treat that combines the rich, nutty flavor of peanut butter with a soft, buttery cookie and a luscious, silky milk chocolate ganache filling. This recipe delivers the perfect balance of flavors and textures, resulting in cookies that are delightfully soft in the center with a slightly crisp edge.
They are surprisingly simple to make, requiring just a handful of common pantry staples. Whether you’re a seasoned baker or trying your hand at baking for the first time, this recipe for Peanut Butter Thumbprint Cookies is sure to become a favorite in your collection.
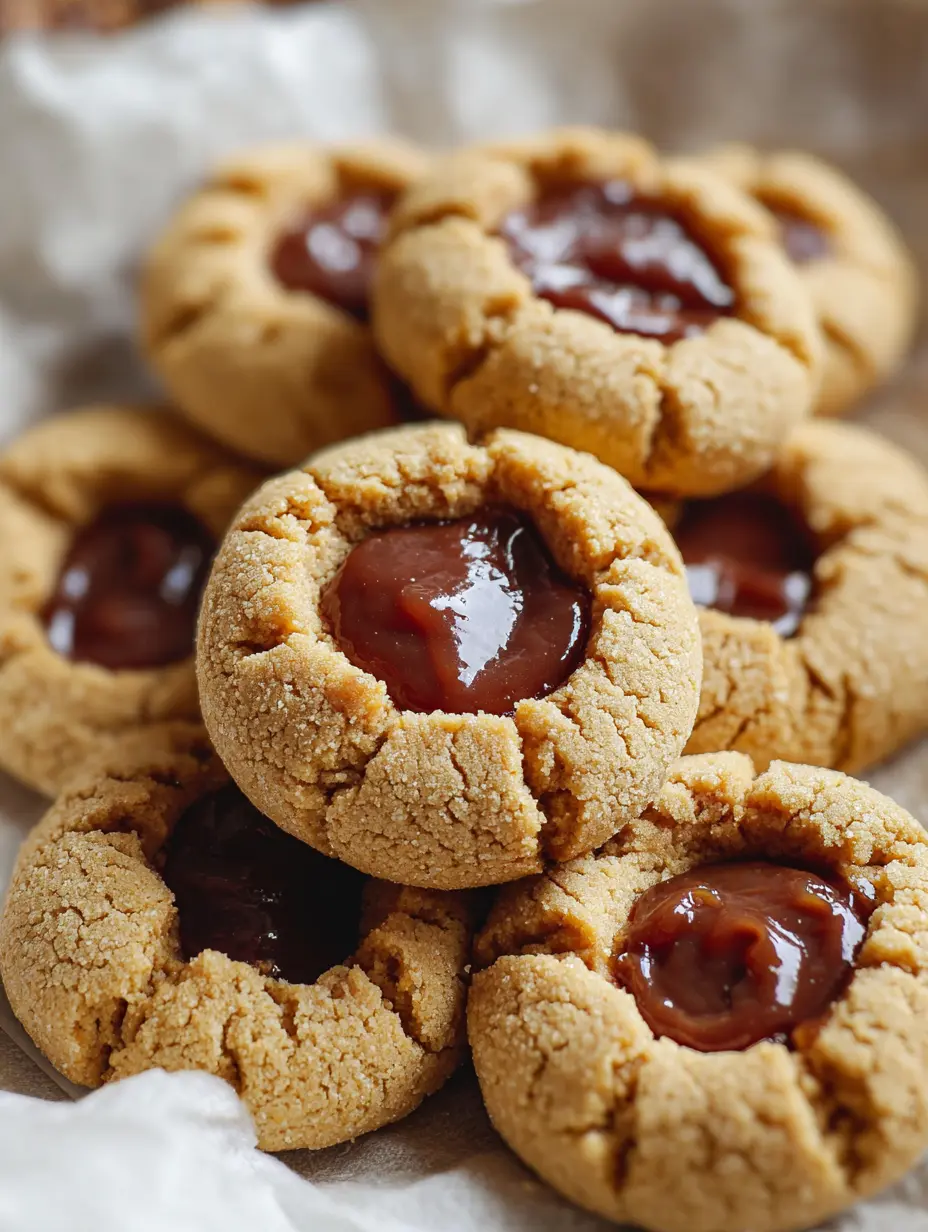
This recipe is an elevated version of the classic jam-filled thumbprint cookie, swapping fruit preserves for a decadent milk chocolate ganache that pairs perfectly with the peanut butter dough. The process of creating the thumbprint is both fun and crucial to the cookie’s final form. That gentle press in the middle of the soft, partially-baked dough creates the perfect vessel for the ganache. The result is a beautiful, professional-looking cookie that tastes as incredible as it looks.
Let’s walk through the simple steps to create these delightful treats that are perfect for holidays, cookie exchanges, or a comforting weekend baking project. You can find more amazing, simple dessert ideas, like our No Bake Strawberry Cheesecake with Biscuit Base, on our site for other easy, crowd-pleasing options.
Ingredients and Preparation for Perfect Cookies
The secret to these cookies’ success lies in using quality ingredients and following a few key techniques. For the cookie dough, you’ll need all-purpose flour, baking soda, kosher salt, unsalted butter at room temperature, creamy peanut butter, granulated sugar, brown sugar, a large egg, and pure vanilla extract. For the filling, you’ll need milk chocolate and heavy whipping cream.
Using room-temperature butter and egg ensures they emulsify properly with the sugars, creating a light and airy cookie texture. The combination of granulated and brown sugar gives the cookie its perfect sweetness and a slight chew. Creamy, standard peanut butter works best for a smooth dough consistency.
Before you begin, preheat your oven to 350°F (175°C). This is a crucial first step to ensure the oven is at the right temperature when your cookie dough balls are ready to bake. Line your baking sheets with parchment paper or silicone baking mats.
This prevents sticking and makes cleanup a breeze, and it also promotes even baking. Having all your ingredients measured and ready to go, a process known as ‘mise en place,’ makes the entire baking process smoother and more enjoyable.
Critical Ingredient Notes
For this recipe, standard creamy peanut butter is recommended. Natural peanut butter that separates can sometimes alter the texture and spread of the cookie. The milk chocolate should be chopped finely to ensure it melts smoothly and evenly when the hot cream is poured over it.
A good quality chocolate will yield a superior ganache. Remember, we prioritize safe and wholesome ingredients in all our recipes. All components, from the dairy to the flavorings, are chosen for their purity and quality, ensuring a delicious and suitable treat for everyone.
Step-by-Step Baking Instructions
Making the Cookie Dough
Start by whisking together the dry ingredients: the all-purpose flour, baking soda, and kosher salt in a medium bowl. Set this aside. In the bowl of a stand mixer fitted with the paddle attachment, or using a hand-held mixer, beat the room-temperature unsalted butter and peanut butter on medium-high speed until the mixture is perfectly smooth, creamy, and well combined, about 2 minutes.
Scrape down the sides of the bowl with a spatula. Add both the granulated sugar and brown sugar to the butter mixture. Beat on medium-high for about 1 more minute until fully incorporated and the mixture looks light and fluffy.
Scrape the bowl again. Add the room-temperature egg and the pure vanilla extract. Beat on medium speed for another minute until the egg is fully blended in and the mixture is uniform. With the mixer on low speed, gradually add the flour mixture.
Mix just until the flour disappears and no dry streaks remain. Be careful not to overmix at this stage, as overworking the dough can lead to tough cookies.
Shaping, Baking, and Creating the Thumbprint
Using a cookie scoop or a tablespoon measure, portion the dough into 1 ½ tablespoon-sized balls. Roll them between your palms to form smooth spheres. Place them on your prepared baking sheets, spacing them about 2 inches apart to allow for slight spreading.
You should fit about 12 dough balls on a standard half-sheet pan. Bake in the preheated oven for 8 minutes. The cookies will still look soft and puffy. This is the key moment.
Remove the pan from the oven. Working quickly and carefully (the pan is hot!), use the rounded bottom of a 1-teaspoon measuring spoon or the pad of your thumb to make a firm indent in the center of each cookie. You will likely see slight cracks appear around the edges; this is normal and adds to the homemade charm. Immediately return the pan to the oven and bake for 1 additional minute.
This sets the shape. Remove the cookies from the oven and let them cool on the baking sheet for 5 minutes. They will be very soft initially but will firm up as they cool. After 5 minutes, transfer them to a wire cooling rack to cool completely.
Preparing the Silky Milk Chocolate Ganache Filling
You can prepare the ganache while the first batch of cookies is baking for efficient timing. Place the finely chopped milk chocolate in a heatproof glass or metal bowl. In a small saucepan, heat the heavy whipping cream over medium heat until it is just beginning to simmer around the edges—you’ll see small bubbles form.
Do not let it boil vigorously. Immediately pour the hot cream over the chopped chocolate, ensuring the chocolate is mostly submerged. Let it sit undisturbed for 2 full minutes. This allows the heat from the cream to gently melt the chocolate.
After 2 minutes, begin stirring gently with a whisk or spatula, starting from the center and working outward, until the mixture is completely smooth, glossy, and homogeneous. This is your ganache. Allow it to cool at room temperature while the cookies finish baking and cooling.
It should remain fluid but will thicken slightly as it cools. For the perfect consistency for filling, wait until the cookies are on the cooling rack. The ganache should be thick enough to hold its shape but still pourable.
Assembling the Finished Cookies
Once the cookies are completely cool and the ganache has thickened to a spoonable consistency, it’s time to assemble. Using a small spoon, fill the indent of each cookie with about ½ teaspoon of the milk chocolate ganache. The ganache will settle and may melt slightly into the warm cookie if they are not fully cooled, but it will set again as it cools completely. If you prefer a neater look, let the cookies cool entirely and let the ganache thicken a bit more before filling.
The contrast of the golden peanut butter cookie with the dark chocolate center is simply beautiful. These cookies pair wonderfully with a glass of cold milk or a cup of coffee. For another fantastic party food that’s always a hit, try our 4-Ingredient Easy Guacamole to start your meal.
Tips for Success and Storage
For consistently sized cookies, a cookie scoop is highly recommended. It makes the process faster and ensures even baking. If your dough seems too soft to handle after mixing, you can chill it in the refrigerator for 15-20 minutes before scooping and rolling. This can help prevent excessive spreading. When making the thumbprint, if the spoon sticks, you can lightly grease the bottom with a tiny bit of butter or oil.
Ensure your chocolate is chopped finely for a lump-free ganache. If your ganache seems too thin, let it cool longer. If it becomes too thick, you can gently re-warm it for a few seconds in the microwave or over a double boiler.
To store these cookies, place them in a single layer in an airtight container at room temperature for up to 4 days. You can also freeze the baked and cooled cookies (unfilled) for up to 3 months. Thaw at room temperature and fill with ganache just before serving. The ganache can be made a day ahead and stored covered in the refrigerator. Gently re-warm it to a fluid consistency before using. These cookies are perfect for gifting or bringing to a gathering.
They are a classic homemade dessert that showcases the wonderful flavor of peanut butter in a beautiful, bite-sized package. For a savory and hearty dip that’s perfect for any gathering, be sure to check out our Loaded Guacamole with Corn and Beans recipe.
Nutritional Information for Peanut Butter Thumbprint Cookies
As with any dessert, enjoying these cookies in moderation is key. They are a treat rich in flavor and designed for special occasions. Below is a breakdown of the approximate nutritional values per cookie, based on a yield of 22 cookies. Remember, individual results may vary slightly based on specific ingredient brands and exact portion sizes.
| Nutrient | Amount per Serving |
|---|---|
| Calories | 169 calories |
| Total Fat | 10 grams fat |
| Carbohydrates | 17 grams carbohydrates |
| Protein | 3 grams protein |
| Fiber | 1 grams fiber |
| Sugar | 9 grams sugar |
| Sodium | 100 milligrams sodium |
In conclusion, these Peanut Butter Thumbprint Cookies are more than just a dessert; they are a baking experience that yields delicious, impressive results. The process is straightforward, the ingredients are simple, and the payoff is enormous. The soft, peanut buttery cookie combined with the rich, creamy chocolate ganache creates a symphony of textures and flavors in every bite.
They are sure to bring smiles to anyone who tries them. So, preheat your oven, gather your ingredients, and get ready to bake a batch of these irresistible homemade classics.
Recipe
Print
Peanut Butter Thumbprint Cookies
- Total Time: 59 min
- Yield: 22 servings 1x
Description
Classic soft peanut butter cookies with a rich milk chocolate ganache thumbprint center. An easy, impressive, and utterly delicious homemade treat.
Ingredients
1 ½ cups all-purpose flour (188g)
½ teaspoon baking soda
½ teaspoon kosher salt
½ cup unsalted butter, room temperature (113g)
¾ cup peanut butter (185g)
¼ cup granulated sugar (50g)
½ cup brown sugar (100g)
1 large egg, room temperature
1 teaspoon pure vanilla extract
4 ounces milk chocolate, chopped finely (112g)
¼ cup heavy whipping cream (2 ounces/60mL)
Instructions
- Preheat oven to 350°F. Line baking sheets with parchment.
- Whisk flour, baking soda, and salt in a medium bowl. Set aside.
- Beat butter and peanut butter until creamy, about 2 mins.
- Add sugars and beat 1 more minute until fluffy.
- Beat in egg and vanilla until combined.
- Mix in flour mixture on low until just incorporated.
- Roll dough into 1.5 tbsp balls and place on sheets.
- Bake for 8 minutes. Remove and make an indent in each cookie center.
- Return to oven for 1 more minute.
- Cool on pan 5 mins, then transfer to a wire rack.
- For ganache: Pour hot cream over chopped chocolate. Let sit 2 mins, then stir until smooth.
- Cool ganache slightly, then fill each cookie indent with about ½ tsp.
Notes
- Use creamy, not natural, peanut butter for best texture.
- The cookie dough balls can be chilled for 20 mins if too soft.
- Chop chocolate finely for a smooth ganache.
- Store filled cookies in an airtight container at room temp.
- Prep Time: 20 min
- Cook Time: 9 min per batch
- Category: Main Course
- Method: Baked
- Cuisine: American
Nutrition
- Serving Size: 1 cookie
- Calories: 169 calories
- Sugar: 9 grams sugar
- Sodium: 100 milligrams sodium
- Fat: 10 grams fat
- Carbohydrates: 17 grams carbohydrates
- Fiber: 1 grams fiber
- Protein: 3 grams protein