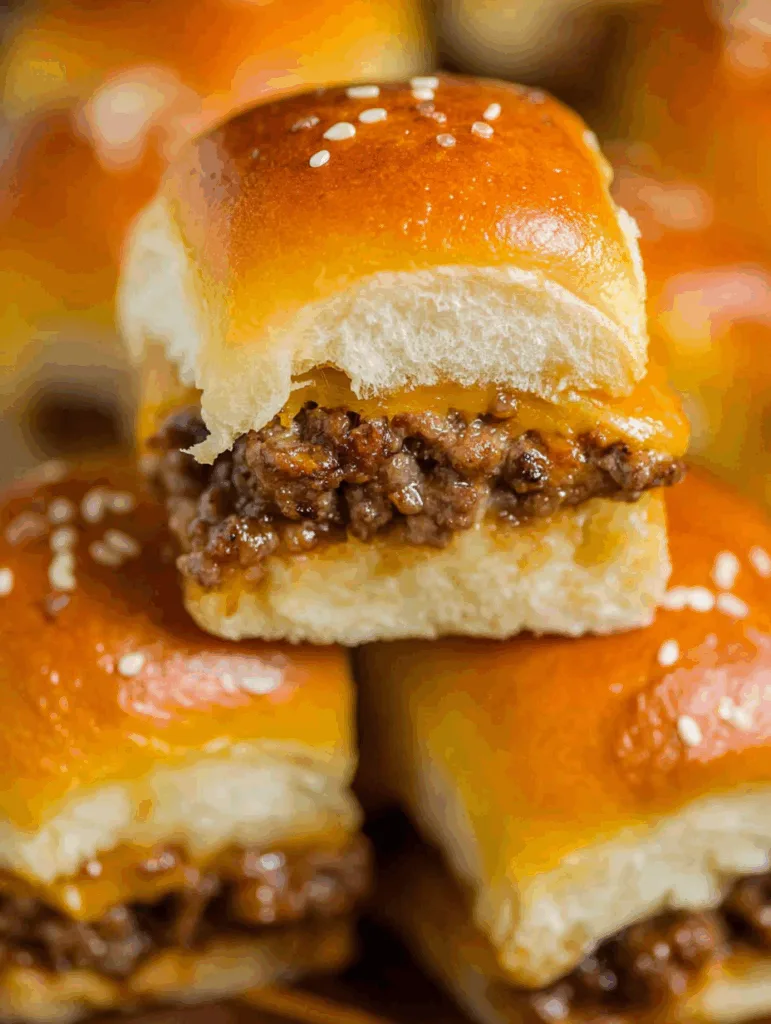
Mini Cheeseburger Sliders on Hawaiian Rolls pack big burger flavor into small, party-perfect bites. Every slider bursts with juicy beef, melted cheddar, and buttery rolls that are soft and sweet. They are quick, hearty, and ready in just 30 minutes. Perfect for weeknights, parties, or when hunger hits fast.
The Secret to Perfect Mini Cheeseburger Sliders
A classic cheeseburger is great, but sometimes you just want something easy to grab and even easier to share. That is where these mini sliders come in. They are everything you love about a full-sized burger, only smaller, simpler, and faster to make.
These sliders combine juicy ground beef, a touch of onion for extra flavor, and creamy texture that keeps every bite moist. The cheddar cheese melts between layers of sweet, buttery rolls, creating a perfect balance of savory and soft. Hawaiian rolls bring their gentle sweetness to the table, soaking up all that cheesy goodness without getting soggy.
The real magic is that you make all 24 sliders at once. No flipping individual patties. Just layer, bake, and slice. The result is a golden, cheesy tray of mini burgers that disappear faster than you can say “seconds.”
What Makes These Sliders Irresistible
- Juicy ground beef cooked with diced onions and simple seasonings
- A creamy mix-in for tender, flavorful meat
- Two layers of melted cheddar cheese for that gooey finish
- Hawaiian rolls that hold together yet stay soft and buttery
Why Hawaiian Rolls Steal the Show
- Slight sweetness balances the savory beef and cheese
- Soft texture absorbs flavor without falling apart
- The perfect size for bite-sized sliders or party trays
Recipe
Print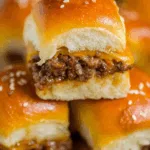
Mini Cheeseburger Sliders on Hawaiian Rolls
- Total Time: 30 minutes
- Yield: 24 sliders 1x
Description
Mini Cheeseburger Sliders on Hawaiian Rolls are juicy, cheesy, and beefy, everything you love about classic burgers in a bite-sized version. Perfect for parties or quick dinners.
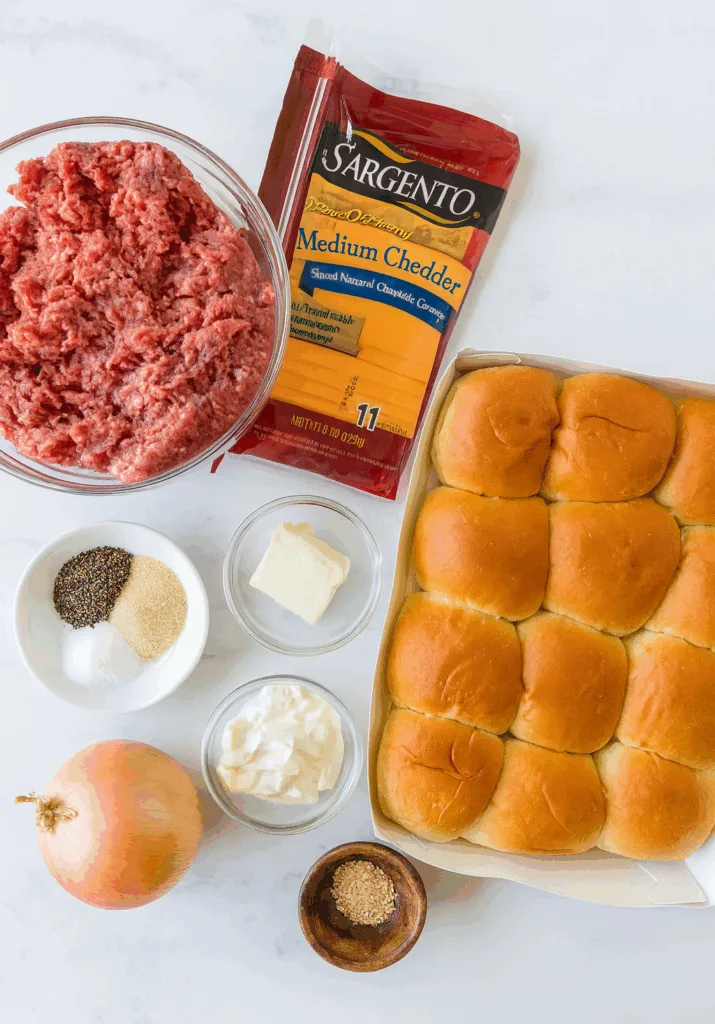
Ingredients
- 2 lb lean ground beef (90/10 or 93/7 fat content)
- 1/2 Tbsp olive oil (7 ml)
- 1 tsp salt (5 g)
- 1 tsp black pepper (5 g)
- 1 tsp garlic powder (5 g)
- 1/2 large yellow onion, finely diced
- 1/4 cup mayonnaise (60 g)
- 8 slices medium cheddar cheese (about 6 oz / 170 g)
- 6 oz shredded cheddar cheese (170 g)
- 24 Hawaiian rolls (2 packs of 12)
- 2 Tbsp unsalted butter, melted (30 g)
- 1 Tbsp sesame seeds (10 g)
Instructions
- Preheat oven to 350°F (175°C). Lightly grease or butter the bottom of a rimmed baking sheet.
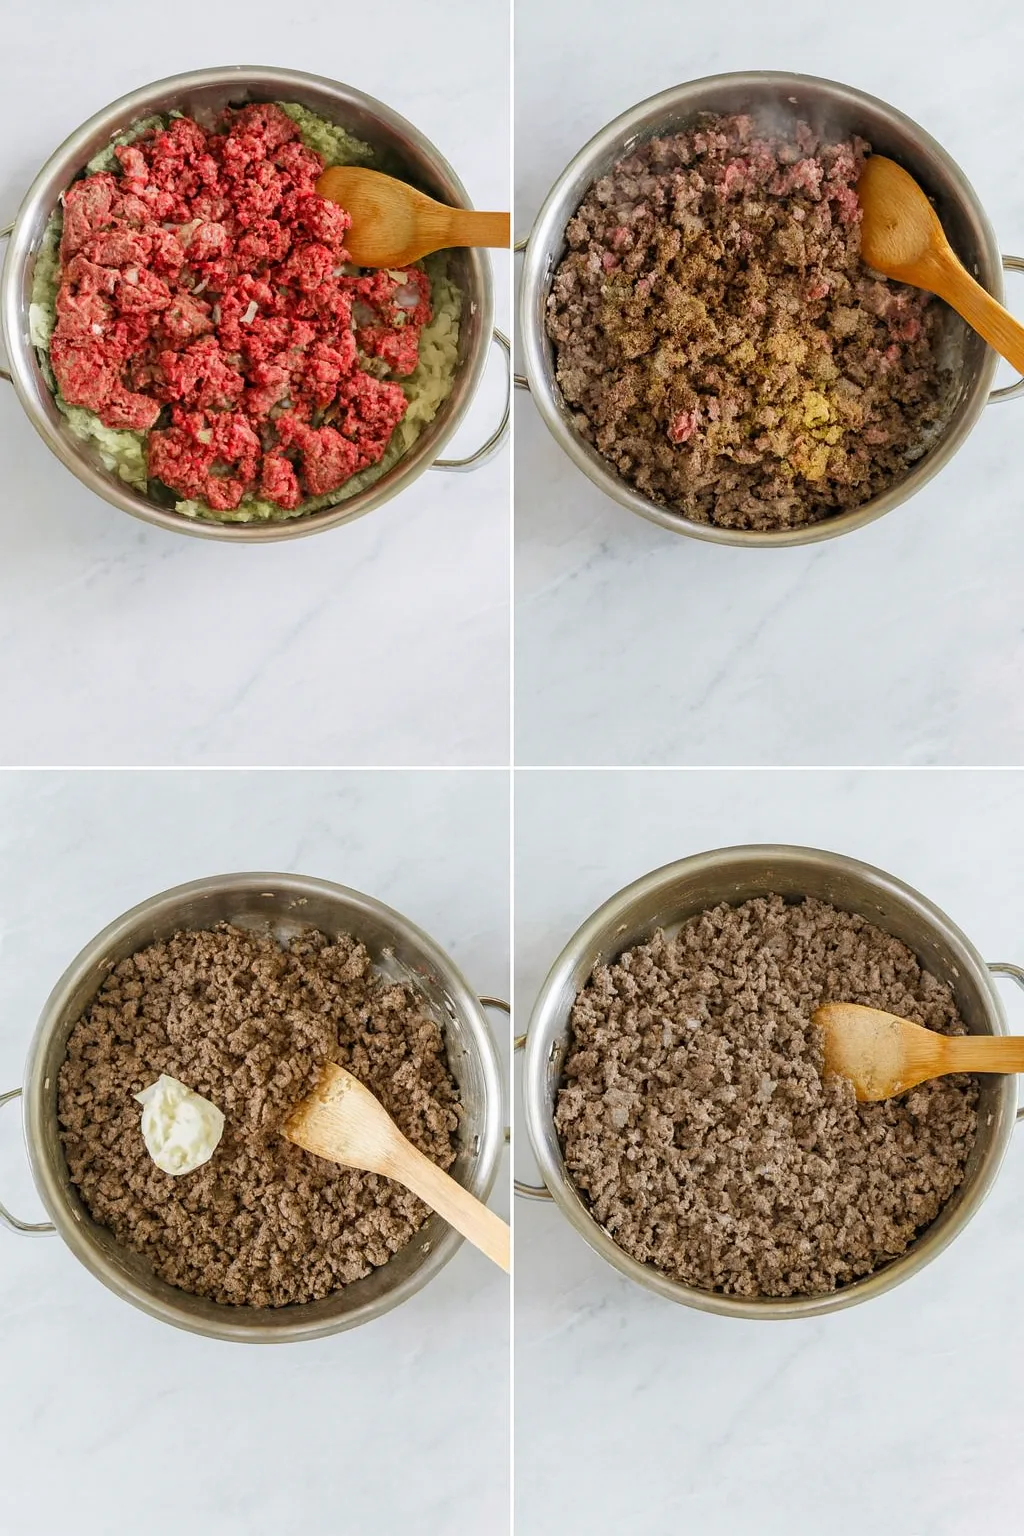
- Heat olive oil in a skillet over medium-high heat. Add onions and sauté until softened and translucent.
- Add ground beef to the skillet. Break it apart with a spatula and cook until browned. Season with salt, black pepper, and garlic powder. Remove from heat.
- Tilt the skillet and spoon off any excess fat. Stir in mayonnaise until evenly combined.
- Slice Hawaiian rolls horizontally, keeping each set of 12 connected. Place the bottom halves on the baking sheet.
- Line the bottom halves with sliced cheddar cheese. Spread the cooked beef mixture evenly over the cheese.
- Top the beef with shredded cheddar cheese. Place the top halves of the rolls over the cheese layer.
- Brush the tops with melted butter and sprinkle sesame seeds evenly over the surface.
- Bake for 12 to 15 minutes or until the tops are golden and the cheese has melted through.
- Cool slightly before slicing into individual sliders. Serve warm and enjoy.
Notes
- These sliders can be assembled several hours ahead and baked before serving.
- For reheating, cover loosely with foil and warm in a 325°F (160°C) oven for 10 minutes.
- Experiment with cheeses like mozzarella, pepper jack, or Swiss for extra flavor.
- Add a drizzle of your favorite sauce like garlic mayo or smoky barbecue for variety.
- Serve alongside crispy fries or coleslaw for a complete meal.
- Prep Time: 8 minutes
- Cook Time: 22 minutes
- Category: Appetizer
- Method: Baking
- Cuisine: American
Nutrition
- Serving Size: 1 slider
- Calories: 266
- Sugar: 1
- Sodium: 473
- Fat: 13
- Saturated Fat: 6
- Unsaturated Fat: 7
- Trans Fat: 0
- Carbohydrates: 21
- Fiber: 2
- Protein: 16
- Cholesterol: 44
Step-by-Step Breakdown for the Best Sliders
Getting these sliders just right is all about layering flavor and texture. You don’t need fancy tools, just a little technique and a touch of patience. Here’s how to make your sliders taste like something straight out of a food truck kitchen.
Building Flavor the Easy Way
Start with your skillet and heat a little olive oil until it shimmers. Add finely diced onions and cook them until soft and fragrant. This step builds the foundation of flavor — skip it, and your sliders lose depth. Once the onions turn translucent, stir in your ground beef and break it apart gently with a spatula. The key word here is gently; overworking the meat can make it dense.
Season with salt, black pepper, and garlic powder. These simple seasonings allow the beef’s natural flavor to shine. Once it’s browned, tilt the skillet and remove any excess fat. Stir in a bit of creamy mayonnaise to hold everything together and lock in moisture. This keeps your sliders juicy even after baking.
Here’s a quick summary of the cooking flow:
| Step | Goal |
|---|---|
| Sauté onions | Add sweetness and aroma |
| Brown the beef | Develop rich, savory flavor |
| Mix in mayonnaise | Keep meat moist and creamy |
Assembling the Ultimate Slider Layers
This part feels a bit like building a lasagna, only much faster. Slice your Hawaiian rolls in half and place the bottom halves on a lightly buttered baking sheet. Line the bread with sliced cheddar – this forms a cheesy barrier so the rolls don’t absorb too much moisture. Spread your beef mixture evenly over the cheese, pressing gently with a spatula to square off the edges.
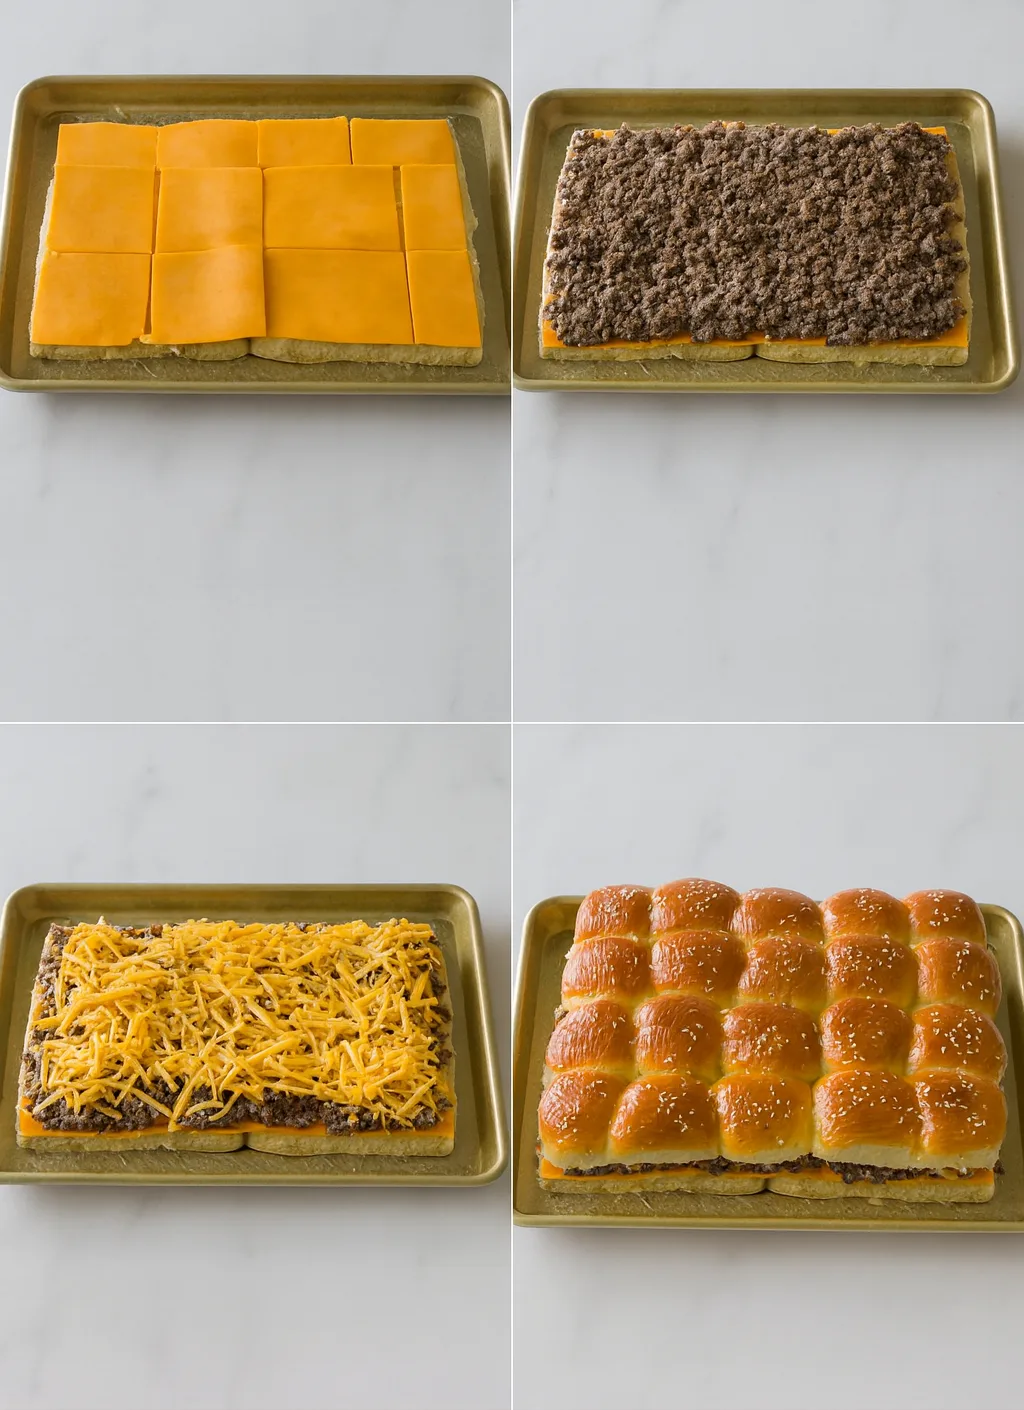
Now comes the second layer of cheese. Sprinkle shredded cheddar over the beef so it melts beautifully into every corner. Add the top halves of rolls, brush with melted butter, and sprinkle sesame seeds for a golden, bakery-style finish.
Slide your tray into the oven and bake at 350°F for about 12 to 15 minutes. You’ll know they’re ready when the tops are golden and the kitchen smells like pure happiness.
For serving, let them rest a few minutes before slicing. The cheese needs that short pause to set – otherwise, you risk losing half your gooey perfection to the cutting board.
Serving, Storing, and Reheating Made Simple
You’ve baked your golden tray of mini sliders, and now comes the question: how do you serve, store, and keep them tasting just as good tomorrow? The beauty of these sliders is how well they handle make-ahead prep and reheating without losing that irresistible, cheesy bite.
Smart Make-Ahead Tips
When prepping for a crowd, timing is everything. You can assemble these sliders several hours in advance and pop them in the fridge until baking time. Just cover the tray tightly with foil or plastic wrap to keep the rolls from drying out.
If you’re planning a party, consider baking them right before guests arrive. The aroma alone will do half the entertaining for you. To keep them warm, cover the baked sliders loosely with foil. They’ll stay soft and gooey without turning soggy.
Reheating is simple: preheat your oven to 325°F, cover the sliders with foil, and warm them for 10 minutes. This gentle reheating method keeps the rolls soft while melting the cheese back to perfection. You can even refrigerate leftovers and enjoy them for up to three days — though they rarely last that long.
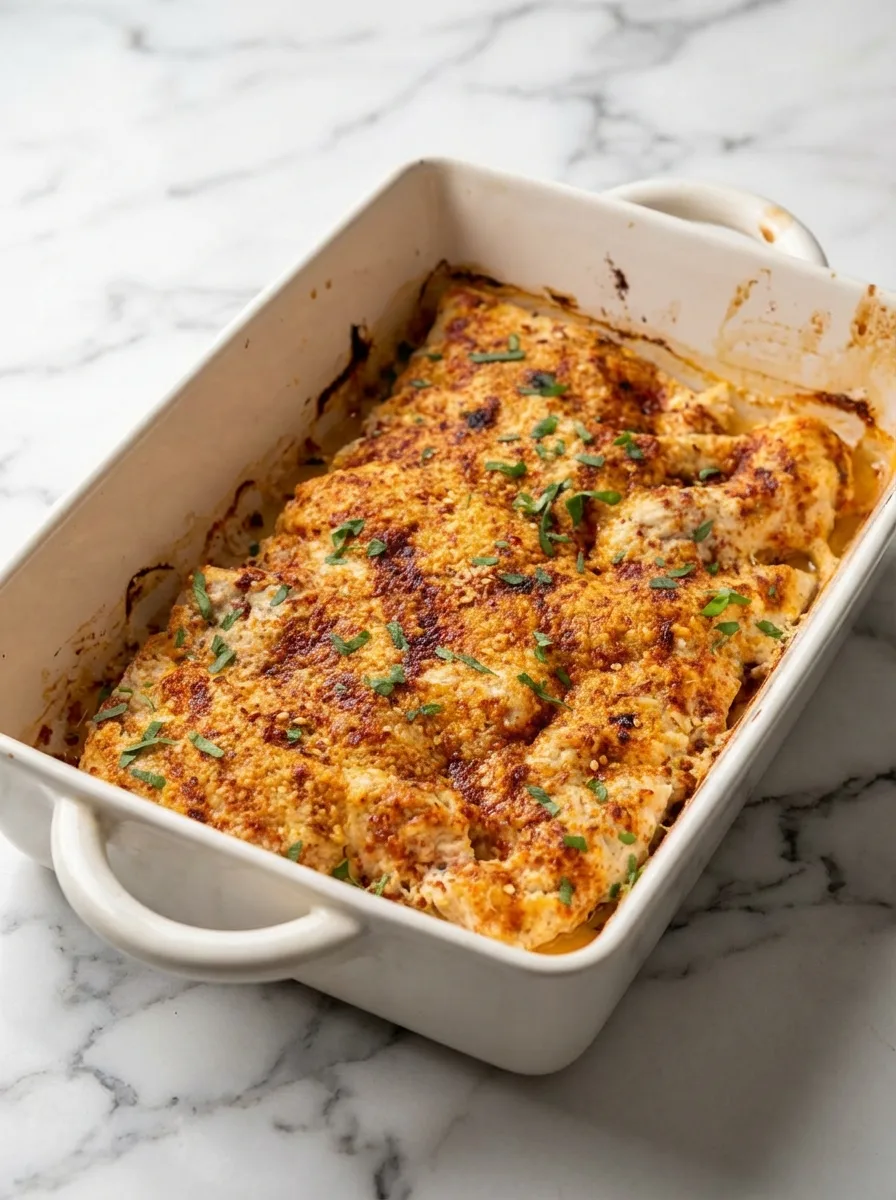
If you’re building a full party spread, serve these alongside something crisp and flavorful like Buffalo Chicken Wonton Cups. The spicy crunch of the wonton cups pairs perfectly with the rich, cheesy sliders.
Perfect Pairings for a Complete Meal
These sliders are stars on their own, but a few smart pairings can turn them into a satisfying meal. Try classic sides like baked fries, coleslaw, or a simple cucumber salad for freshness. A tray of roasted potatoes or corn on the cob also works beautifully.
Fun Variations and Customizations
Once you’ve mastered these sliders, the fun really begins. They’re a blank canvas waiting for your flavor experiments. You can switch up the cheese, tweak the toppings, or play around with sauces until you find your own perfect version. Think of it as burger science – only way tastier.
Cheese, Sauce, and Topping Ideas
Cheddar is the crowd favorite for a reason, but you don’t have to stop there. Mozzarella melts like a dream and gives a mild, stretchy bite. Pepper jack brings just enough heat for those who like a little kick. Swiss adds a smooth, nutty touch that pairs beautifully with beef.
If you love sauce (and who doesn’t), this is your playground. A thin layer of smoky barbecue sauce gives them a sweet edge. Garlic mayo adds a creamy richness. Want something bold? Try a little mustard mixed with honey for that perfect sweet-tangy combo.
Toppings can be as simple or as fancy as you like. Add pickles for crunch, caramelized onions for sweetness, or thin tomato slices for freshness. The goal is balance — juicy, cheesy, and bright all at once.