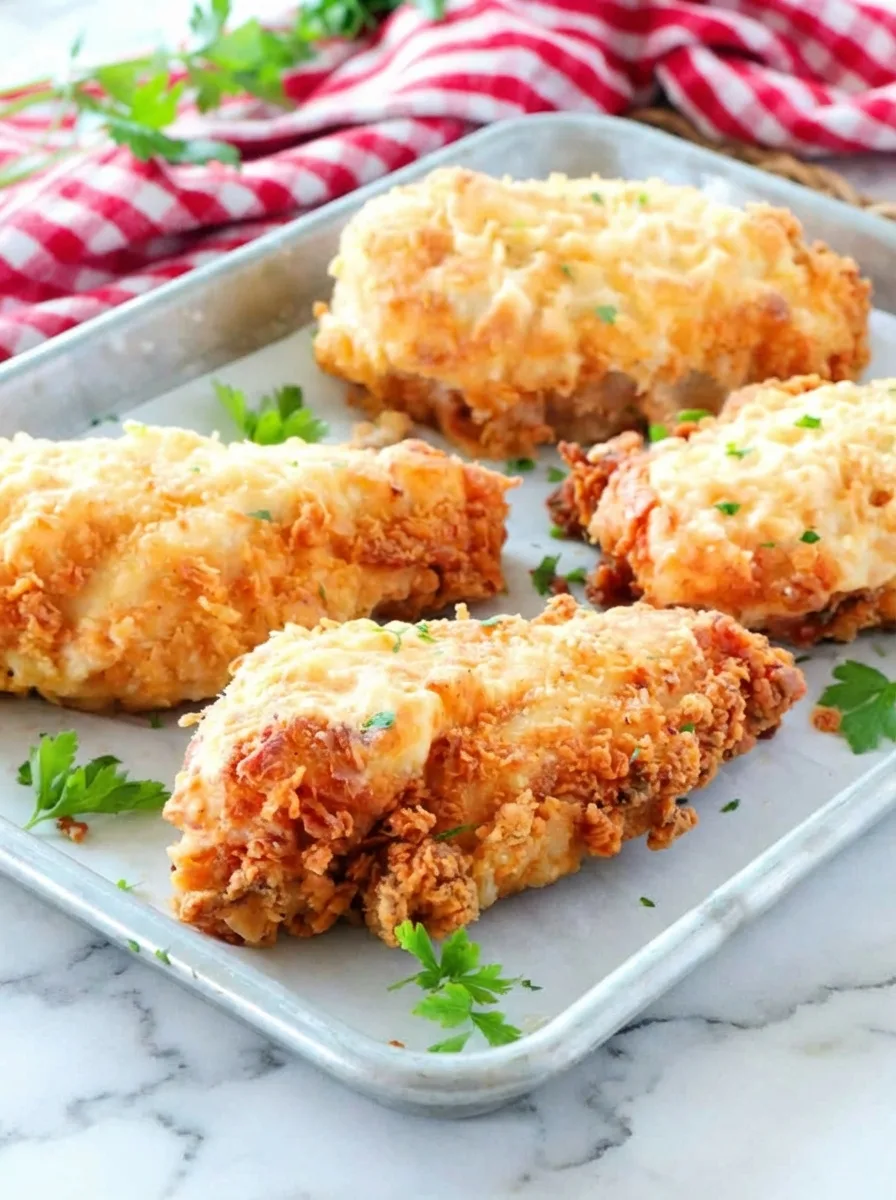
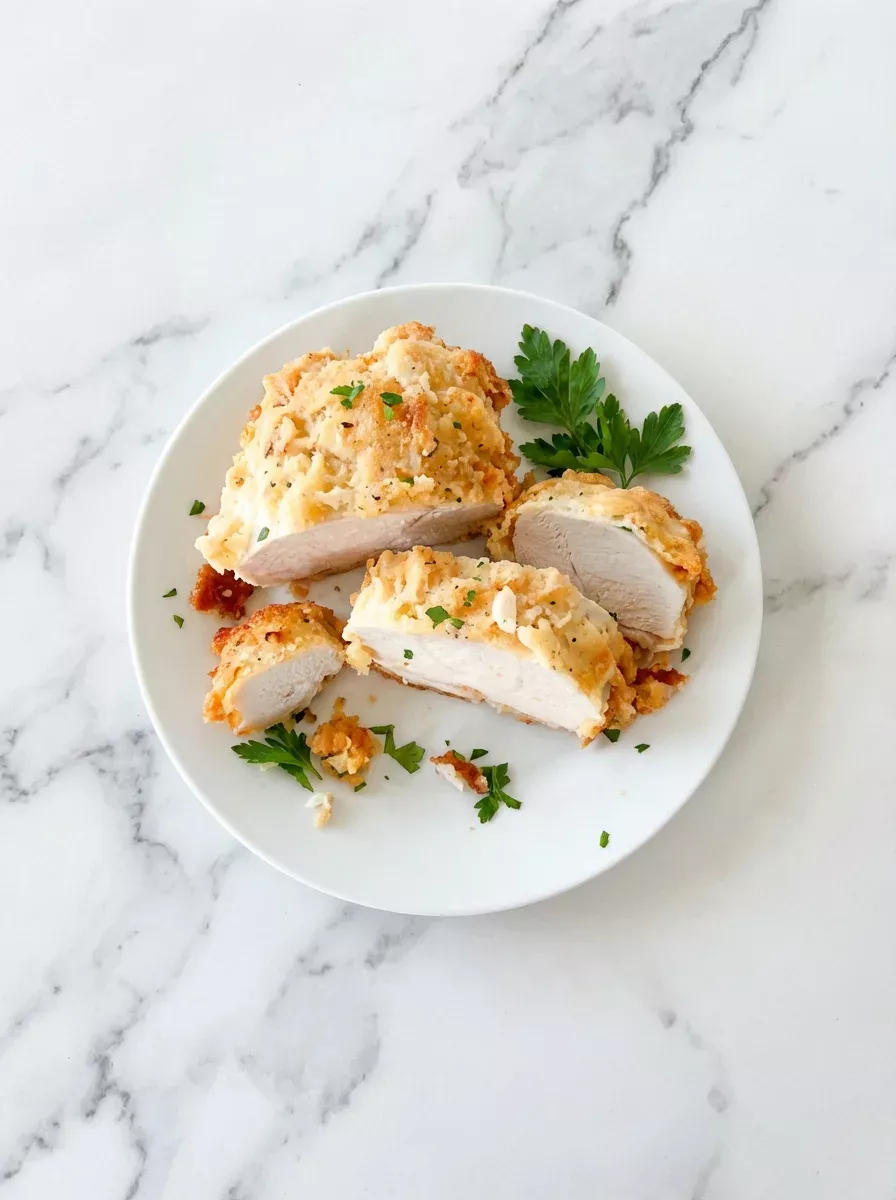
Nothing beats the satisfying crunch of perfectly fried chicken. This Crispy Buttermilk Fried Chicken Breast recipe delivers mouthwatering flavor with a golden crust that stays crisp for hours, paired with tender juicy meat inside.
Best of all, this family-friendly meal comes together with simple ingredients you likely have in your pantry. Plus, the oven finish ensures thorough cooking without drying out your chicken.
Why You’ll Love This Crispy Buttermilk Fried Chicken Breast
This recipe stands out for its perfect balance of ease and flavor. First, the buttermilk marinade tenderizes the chicken while adding subtle tanginess.
Second, the double-cooking method (pan frying followed by baking) guarantees crispy texture without excessive grease.
Third, you need only 10 minutes of active prep time! Many home cooks also appreciate that this dish pairs beautifully with nearly any side – from classic mashed potatoes to fresh summer salads.
Recipe
Print
Crispy Buttermilk Fried Chicken Breast
- Total Time: 2 hr 30 min
- Yield: 4 servings 1x
Description
Juicy chicken breasts with crispy seasoned crust, perfect for family dinners
Ingredients
- 2 cups buttermilk (480 ml)
- 2 teaspoons hot sauce (10 ml)
- 4 boneless, skinless chicken breasts
- 2 1/2 cups all-purpose flour (300 g)
- 1 tablespoon Kosher salt (18 g)
- 1 teaspoon black pepper (2 g)
- 1 1/4 teaspoon paprika (3 g)
- 3/4 teaspoon garlic powder (2 g)
- 1/2 teaspoon onion powder (1 g)
- 2 cups canola oil (480 ml)
Instructions
- In a large bowl, stir together the buttermilk and hot sauce. Add the chicken breasts, cover tightly with plastic wrap, and refrigerate for at least 2 hours or up to 24 hours.
- Set out the chicken (still in the buttermilk) at room temperature for 30 minutes prior to cooking to remove the chill.
- Preheat the oven to 350°F (175°C) and have ready a rimmed baking sheet lined with aluminum foil.
- Add the flour and spices to a large gallon-sized Ziplock bag and mix to combine. Transfer the chicken directly from the buttermilk to the Ziplock bag, seal, and shake until the chicken is evenly coated with the flour mixture. Set aside.
- Add the oil to a large frypan and allow it to come to temperature, between 350-375°F (175-190°C). Add the chicken to the pan, two breasts at a time, and fry for 2 – 2 1/2 minutes on the first side, then turn and fry for 1 1/2 – 2 minutes on the second side.
- Transfer the chicken to the prepared baking sheet and bake for 15-17 minutes (until the chicken registers an internal temperature of 165°F/74°C). Remove from the oven, serve and enjoy!
Notes
- For extra crispy chicken, let breaded pieces rest 10 minutes before frying
- Use an instant-read thermometer to confirm internal temperature
- Maintain oil temperature between batches by adjusting heat
- Prep Time: 10 min
- Cook Time: 20 min
- Category: Main Course
- Method: Baked
- Cuisine: American
Nutrition
- Calories: 580 kcal
- Sugar: 1 g
- Sodium: 1791 mg
- Fat: 25 g
- Carbohydrates: 32 g
- Fiber: 1 g
- Protein: 53 g
Ingredients and Substitutions
Base Components
These essential ingredients create the foundation of our crispy fried chicken:
- Boneless skinless chicken breasts – Use uniform sizes for even cooking
- Canola oil – Has a high smoke point ideal for frying
- All-purpose flour – Creates the crispy outer coating
Sauce and Seasonings
These flavor boosters make your chicken unforgettable:
- Buttermilk – Tenderizes meat and helps breading adhere
- Hot sauce – Adds subtle heat without overpowering
- Paprika, garlic, onion powder – Classic spice blend for depth
No buttermilk? Mix 1 cup milk with 1 tablespoon lemon juice as substitute. Prefer extra crunch? Try adding cornstarch to your flour mixture. For more chicken preparation ideas, browse our collection of easy weeknight chicken recipes.
How to Make Crispy Buttermilk Fried Chicken Breast
Step 1: Marinate the Chicken
Always start by combining the buttermilk and hot sauce in your mixing bowl. Submerge the chicken completely, ensuring all surfaces get coated. This marinade works magic during refrigeration – it breaks down proteins for tender results while infusing flavor deep into the meat. Remember, longer soaking equals better texture!
Step 2: Prepare the Breading
While the chicken rests, mix your dry ingredients thoroughly in that gallon-sized bag. The salt, pepper, paprika, garlic powder and onion powder should distribute evenly through the flour. Combining seasoning directly with flour prevents unevenly spiced spots on your finished chicken.
Step 3: Fry and Bake
After bringing your oil to the ideal temperature (350°F-375°F), fry the chicken in batches to avoid overcrowding. The initial sear creates that beautiful golden crust, then the oven finish ensures safe internal temperatures without drying out the meat. For alternative cooking methods, try our flavorful chicken casserole recipe when you want oven-only preparation.
Pro Tips for Success
- Pat chicken dry before breading for better coating adhesion
- Maintain oil temperature with a kitchen thermometer
- Let fried chicken rest 5 minutes before cutting/serving
Flavor Variations
Customize this versatile recipe to suit your taste preferences. Try adding cayenne pepper to the flour mixture for spicier chicken. For an herby twist, mix dried thyme and rosemary into your breading. Sweet paprika creates milder flavor compared to smoked varieties. Cheese lovers can stir grated parmesan into the flour – it adds wonderful umami notes. Looking for creamy accompaniments? Our popular cheesy crescent chicken bake offers fantastic flavor pairing ideas.
Serving Suggestions
This crispy chicken shines as the star of weekday dinners or weekend feasts. Serve it alongside honey-glazed carrots and garlic mashed potatoes for classic comfort food. Alternatively, slice it over fresh greens for a hearty salad. For picnics, pair with potato salad and fresh watermelon. Kids often enjoy dipping chicken strips in honey mustard or barbecue sauce.
Storage and Freezing Instructions
Store leftovers in airtight containers for up to 3 days. Reheat in a 350°F oven for 10-12 minutes to preserve crispness. For longer storage, freeze cooked chicken breasts in single layers between parchment paper. When ready to eat, bake frozen chicken at 375°F for 20-25 minutes until heated through. Avoid microwaving, as it makes breading mushy.
Nutrition Facts per Serving
| Calories | Fat | Carbs | Protein | Fiber | Sugar | Sodium |
|---|---|---|---|---|---|---|
| 580 kcal | 25 g | 32 g | 53 g | 1 g | 1 g | 1791 mg |
FAQs About Crispy Buttermilk Fried Chicken Breast
Can I use chicken thighs instead?
Absolutely! Adjust cooking times slightly since thighs may require longer baking but yield incredibly juicy results. Maintain the same breading and frying process for best texture.
Why isn’t my breading sticking?
Common causes include wet chicken (pat dry first) or overcrowding in the frying pan. Ensure your oil stays hot enough, and don’t move chicken pieces until the crust sets (about 90 seconds).
How do I make gluten-free version?
Simply substitute all-purpose flour with your favorite gluten-free blend. Many find rice flour and cornstarch mixtures work particularly well for crispy coatings.
Final Thoughts
This Crispy Buttermilk Fried Chicken Breast recipe proves that incredible fried chicken doesn’t require complicated techniques or special equipment. With its juicy interior and shatteringly crisp exterior, this dish will become your go-to comfort food.
The combination approach of pan frying plus baking saves time while delivering unbeatable texture. Whether preparing weeknight dinners or hosting guests, this crowd-pleasing recipe guarantees clean plates every time!