If you’re searching for a filling, flavorful, and efficient meal prep that delivers high protein and classic comfort food taste, this Ultimate Ground Beef Philly Cheesesteak Meal Prep is your answer. It checks every box: budget-friendly, freezable, easily customizable for a crowd, and perfect for anyone with a busy workweek. Whether you’re into healthy meal prep beef recipes or need a robust lunch for a physically demanding job, this dish provides a powerful, savory solution. The familiar flavors of a Philly cheesesteak are transformed into a convenient, hearty bowl, making it a standout among good meal prep meals.
Why This Recipe is a Meal Prep Champion
This recipe is designed with practicality in mind. It leverages affordable frozen ground beef, pre-prepped vegetables, and simple seasonings to create a high-yield dish that tastes even better as the flavors meld in the fridge. It’s an ideal candidate for healthy meal prep work lunches, designed to keep you full and energized through the afternoon.
For blue-collar professionals or anyone with an active lifestyle, it’s a satisfying source of quality fuel that goes far beyond a typical sandwich.
Benefits of This Philly Bowl
Protein-Packed and Satisfying
With 32 grams of protein per serving, this meal helps build and repair muscle while curbing hunger. The combination of lean beef and melted cheese is a classic duo that delivers sustained energy, making it a top choice for high-protein lunch prep ideas.
Customizable to Your Taste
Don’t like mushrooms? Leave them out. Prefer a sharper cheese? Use pepper jack. Want extra veggies? Add spinach at the end. This recipe is a versatile base that adapts to your preferences while maintaining its core deliciousness.
Time-Efficient Batch Cooking
In about 35 minutes, you’ll have eight meals ready to go. This efficient process makes it easy to stay consistent with your nutrition goals, eliminating the daily stress of deciding what to eat. It’s a smarter use of your Sunday afternoon, so the rest of your week is set.
Simple Ingredients for Maximum Flavor
3 lbs lean ground beef: The star ingredient. Using lean ground beef (93/7 or 90/10) provides rich flavor while keeping the overall fat content manageable. Frozen ground beef works perfectly here—just thaw it before cooking.
2 medium green bell peppers, diced: Adds sweetness and a classic Philly crunch. They soften beautifully during sautéing, blending seamlessly into the mix.
2 small onions, sliced: The cornerstone of the dish’s savory depth. Slice them thin for quick caramelization.
4 cups sliced mushrooms (cremini or white): Boosts umami flavor and adds a wonderful meaty texture. They soak up the savory juices.
4 tsp Worcestershire sauce: The secret ingredient for that signature savory, umami-packed flavor.
½ cup beef broth: Adds moisture and richness to the meat mixture, creating a more cohesive and flavorful filling. Use a low-sodium version if desired.
2 cups shredded Colby Jack or provolone cheese: Choose Colby Jack for a mild, melty creaminess or provolone for a sharper, more traditional flavor.
4 cups cooked basmati rice: The perfect, neutral base for the rich, cheesy beef mixture, soaking up all the delicious juices.
Step-by-Step Instructions for Perfect Meal Prep
Step 1: Cook Your Base
If your rice isn’t pre-cooked, prepare the basmati rice according to the package directions. Using basmati rice ensures fluffy, separate grains that won’t become soggy in the meal prep containers. Set it aside to cool slightly.
Step 2: Sauté the Vegetables
In a large skillet or Dutch oven over medium heat, add a small amount of oil. Add the sliced onions, diced bell peppers, and sliced mushrooms. Sauté for 5 to 7 minutes until the onions are translucent and the veggies have softened and developed some caramelization.
This step builds the foundational flavor. Remove the vegetables and set them aside in a bowl.
Step 3: Brown the Ground Beef
In the same skillet, add the lean ground beef. Break it apart with a spatula and cook until it’s fully browned and no pink remains. Drain any excess fat from the pan. Using the same pan means all the flavorful brown bits from the veggies remain.
Step 4: Build the Flavor Profile
Once the beef is browned, stir in the Worcestershire sauce and beef broth. Let the mixture simmer for 2 to 3 minutes, allowing the liquid to reduce slightly and the flavors to concentrate. This is where the simple ingredients transform into something special. Return the sautéed vegetables to the skillet and mix everything together thoroughly.
Step 5: The Cheesy Finale
Sprinkle the shredded cheese evenly over the entire beef and vegetable mixture. Cover the skillet and reduce the heat to low. Let it cook for 2 to 3 minutes, just until the cheese is fully melted and gooey. Avoid stirring too much once the cheese is added to maintain those wonderful cheesy pockets.
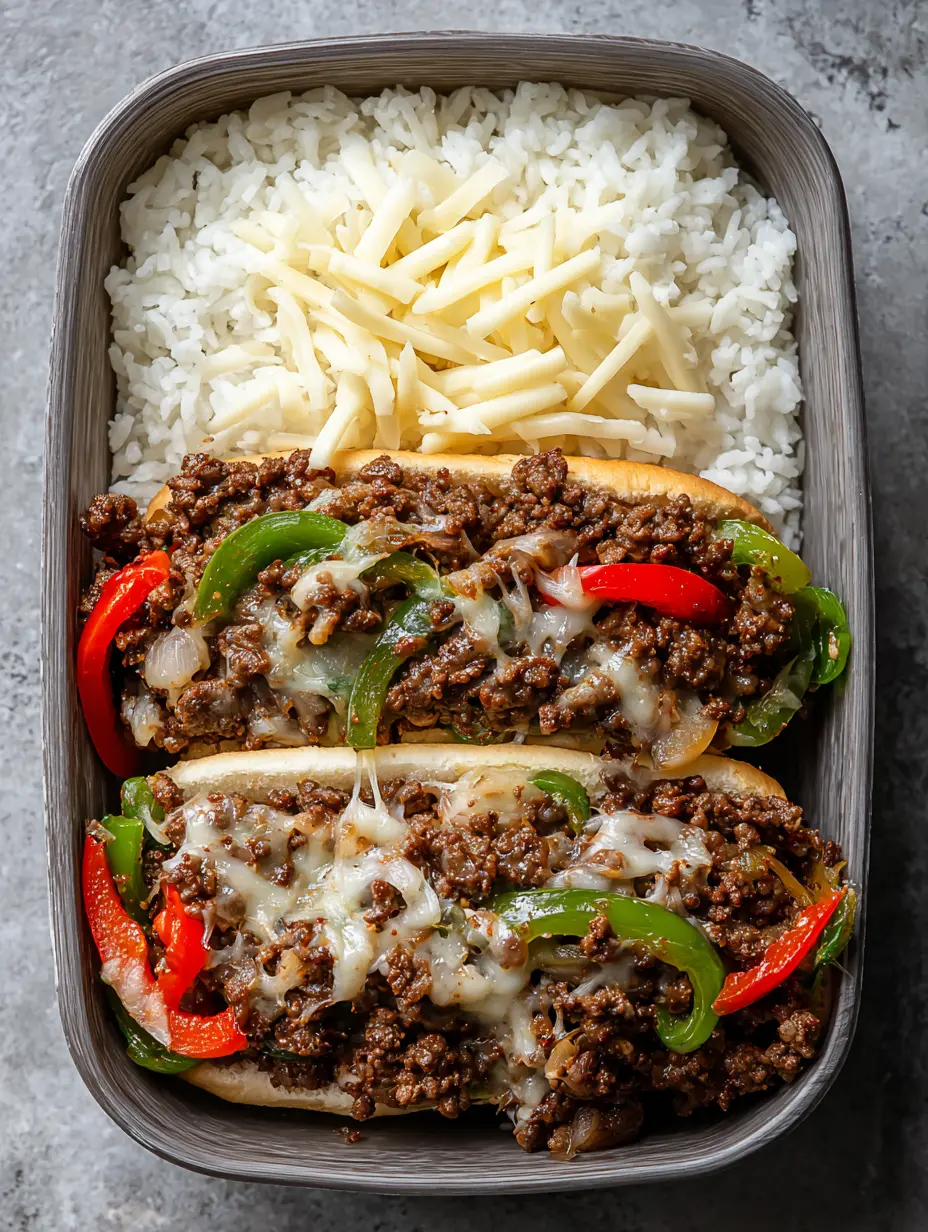
Step 6: Assemble Your Meal Prep Bowls
Evenly divide the cooked rice among eight meal prep containers. Top each portion of rice with an equal amount of the cheesy Philly cheesesteak mixture. Seal the containers and store them in the refrigerator for up to 4 days, or in the freezer for up to 3 months for a longer-term solution.
This is the ultimate formula for hassle-free protein lunch prep.
Important Final Check!
Before sealing your containers, ensure the mixture has cooled slightly to prevent excess steam and condensation, which can make the rice soggy during storage.
Nutritional Information and Storage Tips
This robust meal prep isn’t just tasty; it’s nutritionally balanced to support an active day. Let’s break down the facts.
| Nutrient | Amount Per Serving |
|---|---|
| Calories | 480 |
| Total Fat | 28g |
| Saturated Fat | 12g (approx.) |
| Carbohydrates | 24g |
| Fiber | 2g |
| Sugar | 3g |
| Protein | 32g |
| Sodium | 450mg |
Storage and Reheating: Store your assembled bowls in airtight containers in the refrigerator for up to 4 days. To reheat, microwave on high for 1.5 to 2 minutes, stirring halfway. For frozen bowls, thaw in the refrigerator overnight before reheating.
Variations and Serving Suggestions
This recipe serves as a fantastic blueprint. Here’s how to make it your own.
Vegetable Variations and Add-Ins
- Extra Veggies: Stir in a cup of fresh spinach or kale after the cheese has melted, letting it wilt. Add roasted zucchini or asparagus on the side.
- Low-Carb Option: Replace the rice with cauliflower rice for a low-carb Philly bowl. Sauté it separately or buy it frozen.
Protein and Cheese Swaps
- Different Proteins: Use ground turkey or chicken for a leaner option, or try thinly sliced sirloin for a more authentic ‘steak’ texture.
- Cheese Choices: Monterey Jack, white cheddar, or a smoky Gouda are all excellent choices that melt well. Avoid pre-shredded cheeses with anti-caking agents for the smoothest melt.
Cooking Method Variation: The Slow Cooker
If you want a truly hands-off approach, this recipe easily adapts to a Philly cheesesteak crockpot method. Simply brown the ground beef and add it to the slow cooker with the raw vegetables, Worcestershire, and broth.
Cook on low for 6-8 hours or high for 3-4 hours. Stir in the shredded cheese at the end until melted. Serve over rice.
More Delicious Meal Prep Ideas
If you loved this Philly cheesesteak bowl, don’t miss out on our other popular meal prep recipes. For a fresh and Mediterranean-inspired option, try our Greek Bowls with lemon-herb chicken. Looking for a herby and creamy pasta dish? Our Chicken Pesto Pasta is a fantastic make-ahead dinner. And for a fun, weekend-friendly option perfect for get-togethers, whip up a batch of BBQ Chicken Sliders.
FAQs
Q: Can I make this with a different type of rice?
A: Absolutely! Brown rice, jasmine rice, or even quinoa make excellent, nutritious bases for this meal prep. Just adjust cooking times as needed for your chosen grain.
Q: Is this recipe suitable for freezing?
A: Yes, it freezes exceptionally well. Portion the cooled mixture into freezer-safe containers. To serve, thaw in the refrigerator overnight and reheat as directed. The texture holds up perfectly.
Q: How can I reduce the sodium content?
A> Use a low-sodium beef broth and a reduced-sodium Worcestershire sauce. You can also slightly reduce the amount of cheese or choose a lower-sodium cheese variety.
Q: What makes this a ‘Philly’ style dish?
A> The combination of beef, bell peppers, onions, mushrooms, and Worcestershire sauce captures the classic essence of a Philly cheesesteak, just deconstructed into a convenient, meal-prep-friendly bowl format.
In conclusion, this Ground Beef Philly Cheesesteak Meal Prep is a reliable, delicious, and nutritious solution for conquering your weekly lunches. It perfectly embodies the concept of good meal prep meals: simple to make, satisfying to eat, and effective at keeping you on track with your health and fitness goals.
Recipe
Print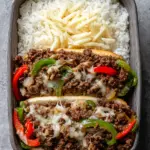
Ground Beef Philly Cheesesteak Meal Prep
- Total Time: 35 min
- Yield: 8 servings 1x
Description
A deconstructed, protein-packed take on the classic sandwich, perfect for make-ahead weekly lunches.
Ingredients
3 lbs lean ground beef
2 medium green bell peppers, diced
2 small onions, sliced
4 cups sliced cremini or white mushrooms
4 tsp Worcestershire sauce
½ cup beef broth
2 cups shredded Colby Jack or provolone cheese
4 cups cooked basmati rice
Instructions
- Cook rice according to package directions. Set aside.
- In a large skillet, sauté onions, bell peppers, and mushrooms for 5-7 minutes until soft. Remove and set aside.
- In the same skillet, brown ground beef until fully cooked. Drain excess fat.
- Stir Worcestershire sauce and beef broth into the beef. Simmer for 2-3 minutes.
- Add sautéed vegetables back to the skillet and mix well.
- Sprinkle shredded cheese over the mixture. Cover and cook on low until cheese is melted.
- Divide rice among 8 containers. Top evenly with the cheesesteak mixture. Seal and store.
Notes
- Store in the refrigerator for up to 4 days or freeze for up to 3 months.
- For a low-carb option, substitute cauliflower rice for basmati rice.
- Reheat in the microwave for 1.5-2 minutes, stirring halfway through.
- Prep Time: 15 min
- Cook Time: 20 min
- Category: Main Course
- Method: Baked
- Cuisine: American
Nutrition
- Calories: 480/serving
- Sugar: 3g/serving
- Sodium: 450mg/serving
- Fat: 28g/serving
- Carbohydrates: 24g/serving
- Fiber: 2g/serving
- Protein: 32g/serving