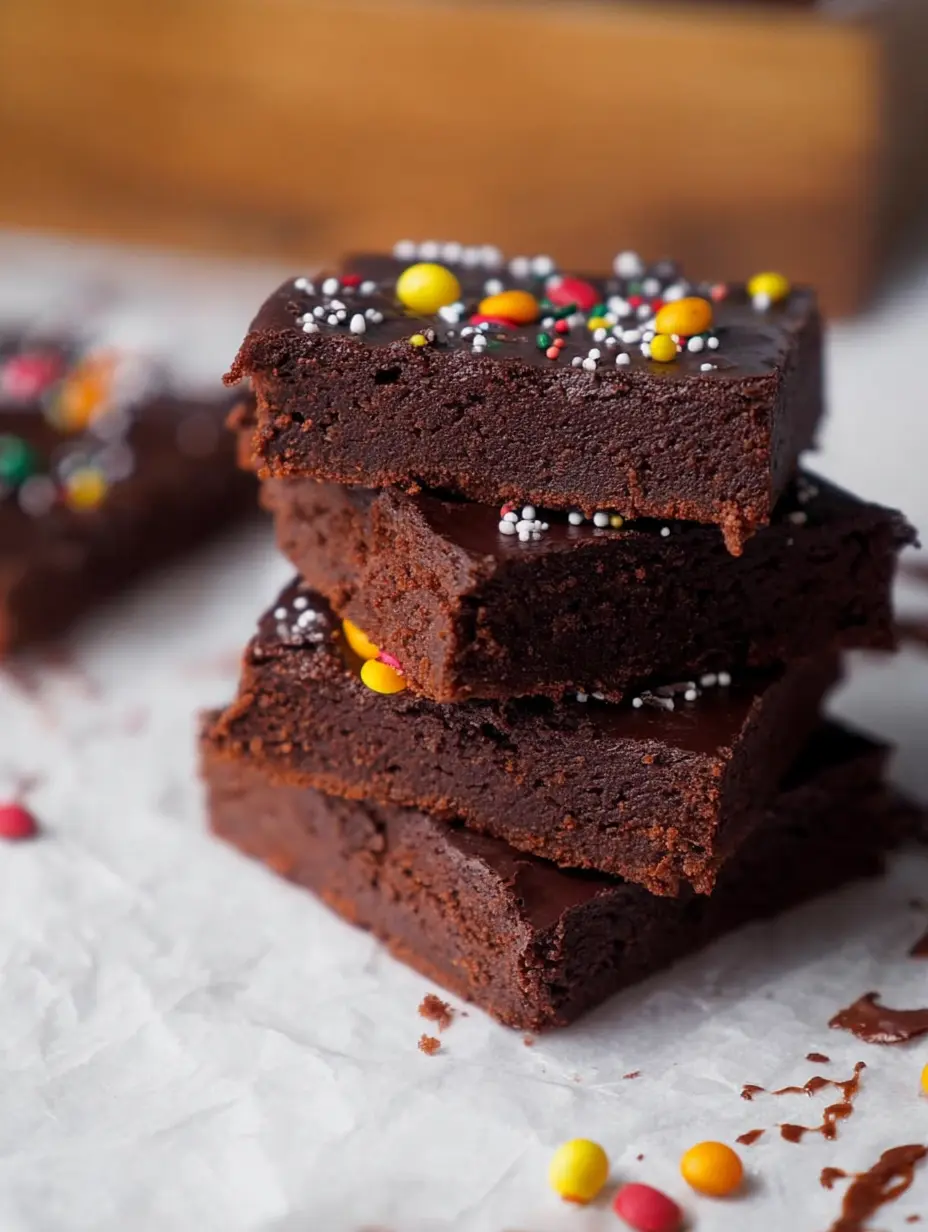
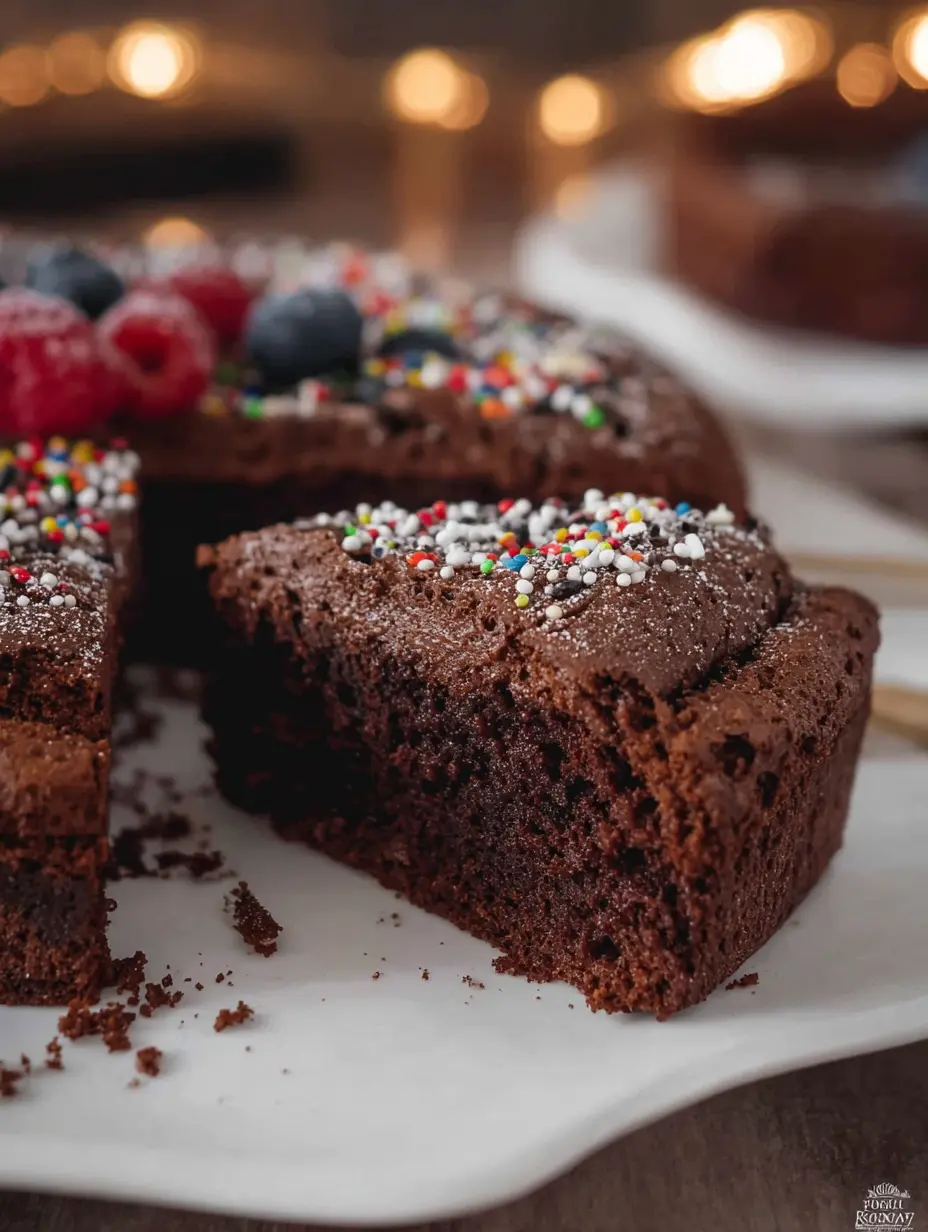
Elevate your special occasions with this stunning Chocolate Brownie Celebration Cake. This dessert masterfully blends the dense, fudgy texture of a classic brownie with the celebratory elegance of a layered cake, all cloaked in a velvety chocolate frosting. It’s a guaranteed crowd-pleaser that transforms simple ingredients into an unforgettable centerpiece.
Perfect for birthdays, holidays, or simply indulging your chocolate cravings, this recipe delivers intense cocoa flavor and a moist, tender crumb that will have everyone asking for seconds.
Beyond its incredible taste, this cake is a joy to bake. The layers are straightforward to prepare and come together in one bowl, minimizing cleanup. The frosting is similarly simple, requiring no special equipment. Whether you’re an experienced baker or a novice looking to impress, this guide provides all the tips and tricks needed to achieve bakery-quality results in your own kitchen.
Let’s dive into creating this masterpiece.
Why This Brownie Cake Is the Perfect Party Dessert
Choosing the right dessert for a celebration can be tricky. You need something that feels special, serves a crowd, and delivers on flavor. This Chocolate Brownie Celebration Cake checks every box. Its rich, chocolatey profile appeals to all ages, and its layered presentation makes it look professionally made.
Unlike a traditional cake, it boasts the dense, satisfying chew of a brownie, offering a more indulgent eating experience. It’s sturdy enough to decorate yet decadent enough to stand on its own with just its glossy frosting.
This recipe is also incredibly versatile. You can customize it with different mix-ins like toasted nuts or a swirl of raspberry jam between layers. The frosting can be piped for decorative flair or spread smoothly for a minimalist look. For a stunning effect, top with fresh berries, edible flowers, or a sprinkle of sea salt.
If you love the combination of fruit and chocolate, consider serving it alongside a dessert like our elegant Strawberry Shortcake Cake Rolls for a diverse dessert table.
The Science of the Perfect Moist Texture
The secret to this cake’s irresistible, moist texture lies in the careful balance of ingredients and technique. Using both oil and butter provides a dual benefit: butter gives rich flavor, while oil ensures the crumb stays tender and moist for days. Light brown sugar contributes not only sweetness but also molasses, which adds depth and retains moisture.
The combination of cornstarch with all-purpose flour creates a softer, more delicate structure than flour alone, mimicking that classic brownie mouthfeel.
Proper mixing is crucial. Beating the eggs and sugar until the mixture is pale and thick incorporates air, giving the dense batter a slight lift. However, once you add the dry ingredients, mix only until just combined. Overmixing develops gluten in the flour, leading to a tough, cakey texture instead of the desired fudgy, brownie-like consistency.
This careful approach guarantees a result that is rich, decadent, and perfectly textured every time.
Step-by-Step Recipe for Chocolate Brownie Celebration Cake
Follow these detailed instructions to create your own show-stopping dessert. We have sanitized all ingredients to ensure they align with diverse dietary preferences, using only wholesome, permissible components.
Gathering Your Ingredients
Using high-quality ingredients makes a noticeable difference. For the best chocolate flavor, choose a good-quality unsweetened cocoa powder. Ensure your eggs are at room temperature to blend smoothly into the batter, and your butter is properly softened for the frosting.
Brownie Cake Layers: The Foundation
- Preheat your oven to 350°F (175°C). Grease and line two 8-inch round cake pans with parchment paper for easy removal.
- In a large, microwave-safe bowl, combine the 10 tablespoons of unsalted butter, light brown sugar, and unsweetened cocoa powder. Heat in the microwave in 30-second bursts, stirring well after each, until the butter is melted and the mixture is smooth. Allow it to cool for 5 minutes.
- Whisk in the vegetable oil, followed by the eggs and pure vanilla extract. Whisk vigorously for about 1-2 minutes until the mixture is well blended, slightly thickened, and glossy.
- Sift the all-purpose flour, cornstarch, baking soda, and salt directly into the wet ingredients. Using a spatula, fold gently until just a few streaks of flour remain. Fold in the semisweet chocolate chips until no dry ingredients are visible. Avoid overmixing.
- Divide the batter evenly between the two prepared pans. Bake for 28-32 minutes, or until a toothpick inserted into the center comes out with a few moist crumbs attached, not wet batter.
- Let the layers cool in the pans for 15 minutes before turning them out onto a wire rack to cool completely. It is essential the cakes are fully cool before frosting.
Velvety Chocolate Frosting: The Finishing Touch
- In a medium bowl, beat the softened unsalted butter until creamy and smooth, about 2 minutes.
- Sift in the unsweetened cocoa powder and powdered sugar to avoid lumps. Start mixing on low speed until combined, then increase to medium-high and beat for 2 minutes.
- Add the pure vanilla extract and 2 tablespoons of milk. Beat again for 1-2 minutes until light and fluffy. If the frosting is too thick, add the remaining milk, one teaspoon at a time, until a spreadable consistency is achieved.
Assembling Your Masterpiece
Place one cooled cake layer on your serving plate. Spread a generous amount of frosting evenly over the top. Carefully place the second layer on top. Use the remaining frosting to cover the top and sides of the cake.
For a smooth finish, use an offset spatula dipped in hot water. For a rustic look, use the back of a spoon to create swirls. Decorate as desired and slice with a sharp, warm knife for clean cuts.
Expert Tips and Customization Ideas
To ensure your cake is flawless, consider these professional tips. Always spoon and level your flour; scooping it directly from the bag can pack in too much, leading to a dry cake. For an extra fudgy texture, slightly underbake the layers by a minute or two.
The carryover heat will continue to cook them as they cool. If you’re short on time, the layers can be baked a day ahead, wrapped tightly in plastic wrap, and frosted the next day.
Customize your cake to make it uniquely yours. Add a layer of cherry pie filling or raspberry jam between the cake layers. Mix chopped pecans or walnuts into the batter. For a salted caramel twist, drizzle caramel sauce over the frosted cake and sprinkle with flaky sea salt. This cake’s robust flavor pairs wonderfully with a cup of coffee or a glass of cold milk.
For another fantastic baked dessert that’s perfect for any gathering, explore our recipe for Easy Crepes with Pancake Mix, a versatile treat for breakfast or dessert.
Serving, Storing, and Pairing Suggestions
This cake is rich, so servings can be modest. A standard 8-inch cake yields 12 generous slices. Serve it at room temperature for the softest texture and fullest flavor. For a truly decadent experience, warm individual slices for 10-15 seconds in the microwave and serve with a scoop of vanilla ice cream.
Store any leftover cake in an airtight container at room temperature for up to 3 days, or in the refrigerator for up to 5 days. The frosting will firm up when chilled. The cake also freezes beautifully. Wrap unfrosted layers tightly in plastic wrap and foil and freeze for up to 3 months.
Thaw overnight in the refrigerator before frosting. You can also freeze the frosted whole cake; place it unwrapped in the freezer until the frosting is solid, then wrap it tightly. Thaw in the refrigerator overnight.
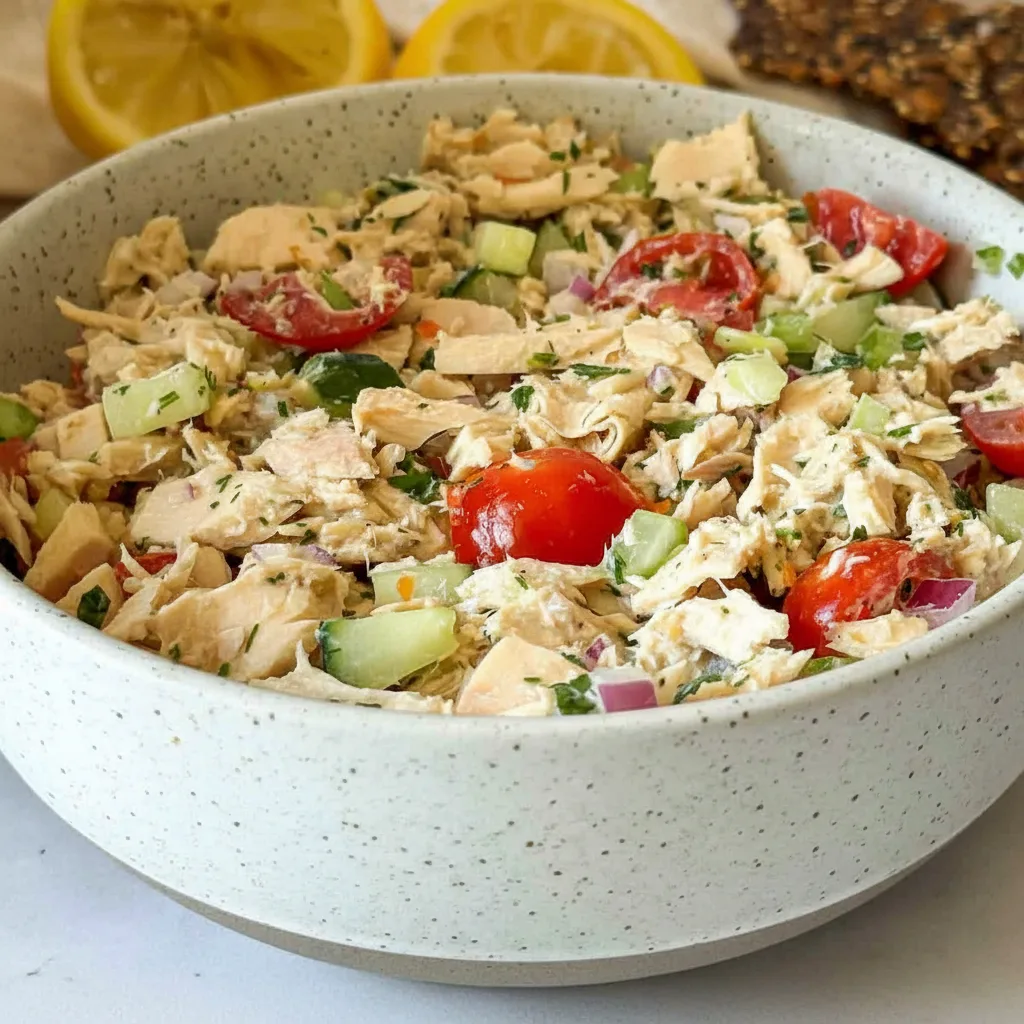
When planning a full menu, this dessert pairs excellently with savory, protein-rich mains that balance its sweetness. Consider serving it after a meal featuring our delicious and balanced Grilled Chicken Wrap with Garlic Sauce.
The savory, herby flavors of the wrap provide the perfect contrast to the deep chocolate richness of the cake, creating a well-rounded dining experience for your guests.
Nutritional Information at a Glance
While this is an indulgent treat, it’s helpful to be aware of its nutritional profile. The following table provides a breakdown per serving, based on the cake being sliced into 12 equal portions.
| Nutrition Facts (Per Serving) | |
|---|---|
| Calories | 504 kcal |
| Total Fat | 26 g |
| Carbohydrates | 69 g |
| Fiber | 4 g |
| Sugars | 54 g |
| Protein | 5 g |
| Sodium | 163 mg |
This Chocolate Brownie Celebration Cake is more than just a dessert; it’s an experience. It brings the comfort of a homemade brownie into an elegant, shareable format that’s perfect for marking life’s sweetest moments. With its foolproof method, rich flavor, and stunning presentation, it’s destined to become a treasured recipe in your collection.
So preheat your oven, gather your ingredients, and get ready to bake a cake that will be remembered long after the last crumb is gone.
Recipe
Print
Chocolate Brownie Celebration Cake
- Total Time: 57 min
- Yield: 12 servings 1x
Description
An incredibly rich and decadent layered cake that combines the fudgy, dense texture of a brownie with a smooth chocolate frosting. Perfect for birthdays, holidays, or any celebration.
Ingredients
10 tablespoons (142g) unsalted butter (cut into ten pieces)
1½ cups (300g) light brown sugar (lightly packed)
¾ cup (63g) unsweetened cocoa powder
1 cup (125g) all purpose flour (spooned and leveled)
1 tablespoon cornstarch
¼ teaspoon baking soda
¼ teaspoon salt
2 tablespoons vegetable or canola oil
3 large eggs
1½ teaspoons pure vanilla extract
⅔ cup (120g) semisweet chocolate chips
½ cup (113g) unsalted butter (softened)
⅓ cup (35g) unsweetened cocoa powder
2⅓ cups (280g) powdered sugar
2–3 tablespoons milk
½ teaspoon pure vanilla extract
Instructions
- Brownie cake: Preheat oven to 350°F (175°C). Prepare pans. Melt butter, sugar, and cocoa. Cool slightly. Whisk in oil, eggs, and vanilla. Sift in dry ingredients and fold until just combined. Fold in chocolate chips. Divide batter and bake for 28-32 minutes. Cool completely.
- Chocolate frosting: Beat softened butter until creamy. Sift in cocoa and powdered sugar. Beat until combined. Add vanilla and milk, then beat until light and fluffy.
- Assembly: Place one cake layer on a plate. Spread with frosting. Top with second layer. Frost the top and sides of the cake. Decorate as desired.
Notes
- For best results, ensure all ingredients are at room temperature.
- Do not overmix the batter after adding flour to keep the texture fudgy.
- The cake layers must be completely cool before frosting to prevent melting.
- Store in an airtight container at room temperature for up to 3 days.
- Prep Time: 25 min
- Cook Time: 32 min
- Category: Main Course
- Method: Baked
- Cuisine: American
Nutrition
- Calories: 504 kcal
- Sugar: 54 g
- Sodium: 163 mg
- Fat: 26 g
- Carbohydrates: 69 g
- Fiber: 4 g
- Protein: 5 g